Photobucket Photobucket Photobucket Photobucket Photobucket Photobucket
Showing posts with label Easter. Show all posts

Friday, March 29, 2013

Egg-citing News!!

Some of you may have noticed that for a few months now I have been telling you about a product  called Perfect Layers in my blog posts.   Well now, Perfect Layers has put together it's very first design team and asked me to join them...how could I resist?!?!   :)  Starting Monday, we will have our very first blog hop.  I'd love it if you would stop by to take a peek and play along.


I was thumbing through some stamped images yesterday and came across this beautiful Stamping Bella, Bunny with daffodil and HAD to sit down and color her right away.  My girlfriends Kim O'Connell and Tracy Valure have made me fall in love with the UpTown Girls from Stamping Bella and now I'm hooked!!  I couldn't believe how much fun this image was to color....and for no reason other than just for the pure joy of coloring!   (And speaking of coloring, the ground and grass were NOT colored with Copics but with pastel pencils...More about that on Monday!!)


Copics Used:
Skin: E11, E00, E50, R02
Hair: E21, E23, E29
Dress: R05, R02, R11, R00
Flower: YR24, YR15, Y11

I chose some older scrapbook paper in my stash from Imaginese because I love the sweet soft spring colors.  The card mat layers were all created using the Perfect Layers tool.  And they turned out to be a perfect match to a beautiful hand-crocheted flower that was made by my friend, Danielle Lounds.  And that sweet bunch of carrots....those are from the Your Next Stamp Easter Goodies Die set tied together with a bit of twine.  Aren't they adorable?!?!  :)


If you've never heard of Perfect Layers, they are tools designed with a patented "catch lip" that simply "bumps" along the edge of papers or photos for a perfectly matted layer without measuring.  To learn more about Perfect Layers or watch a video on how they work...click HERE!!


Thanks so much for stopping by today.
For those of you who celebrate, my family wishes you and yours a joyous and Happy Easter!!

Tuesday, March 19, 2013

YNS March Release Blog Hop

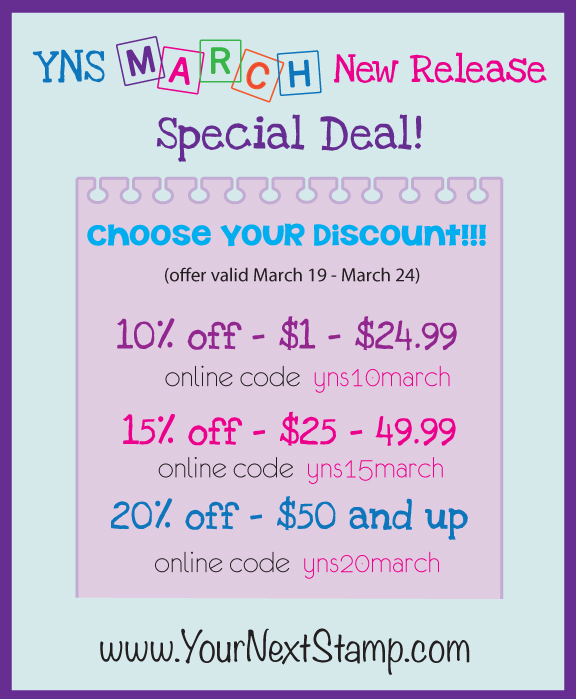
Hi Everyone, and welcome to the Your Next Stamp March Release Blog Hop!!   Hopefully, you've arrived from the uber talented Maureen's Blog - if not and you'd like to participate today, the hop starts at Thanh's Blog.  

We are so excited about our hop this evening because this release is just ADORABLE!!   The entire DT had a blast playing with all of the new stamps and dies and we know you will too!!   

Would you like to win one of THREE New Release Prize Packages hidden within the hop?  Here is what you need to do - visit all of the YNS Designer's blogs that are participating in today's hop and comment on their creations as you go for your chance to win!

The Blog Hop starts today and runs though midnight, March 22nd.  Prize Package winners will be announced on the YNS Blog on Saturday, March 23rd.

Are you ready for some YNS cuteness ?!?


I *told* ya it was C-UTE!!  ;)
Meet Twinkie....it's name is cute!!  Haha  
I created a very simple scene with the YNS Puffy Clouds Die and sun from the WhatNot Seasons One Die Set.  The hills were created with two bits of designer paper from Carta Bella (True Friends) and my favorite parrot green V-Striped ribbon from the Ribbon Carousel.  The teeny tiny bow was made with my Bow Easy using the smallest prongs.  The little bird is part of the Joy stamp set.  The little lamb, clouds and bird were all popped up with foam tape for dimension.


Twinkie was colored using Copic markers
C3, C2, C1, C00 and B37 for the eyes
The cheek and nose were achieved with Faber Castell Pastel pencils...my new obsession!!

And as always, Karen is also offering some amazing Hop Specials!  


Friday, March 23, 2012

There She Goes...Again

It's There She Goes {Again} week at TSG and the Trendsetters are revisiting some previously release stamp sets, Tweeterpated, Flowers of Happiness, Bear Hugs and Hunny Bunnies
 (All these sets are 15% off until March 23)  


I used the Hunny Bunnies set to create some cute Easter Basket gift tags for Nathan & Brooke.  I kept things fairly simple because I wanted to see the chicken wire embossing.  (Which did not show up well in the photos...boo!!)  I used some scraps of papers from My Mind's Eye (Fine and Dandy) paper pad.  And I made a sweet little bow using some Antique Gold Satin Scalloped ribbon and Ivory Satin Center Band ribbon looped through the top to finish things off.


Be sure to stop by the TSG Blog for a list of all the Trendsetters participating in today's
 TSG {Again} Challenge.


Thanks so much for stopping by!!

Monday, March 12, 2012

A Hidden Surprise

This week our There She Goes Challenge is brought to us by Teresa.  She has challenged us to make a card with a hidden surprise.  It can be a gift card, treat box or an explosion card...just show us what you're hiding!!  
  • To be eligible for the giveaway, create a card or project with a hidden surprise, and then come back to the TSG Blog to add your name and a link to your project in the InLinkz that is located at the bottom of this challenge post. This challenge is open until the winner has been announced on the following Monday (March 19th). The winner will get a $5 gift certificate to use in the TSG Web store!
  • By participating in this challenge, you may also find yourself in the Trendsetting Spotlight that shines on the TSG Blog every Thursday. We will be on the lookout to find challenge cards that stand out and show Trendsetting qualities. TSG stamps are not required to participate in the challenges but are appreciated :)
  • You do not need to have a blog to be able to participate in the TSG Challenges! You can simply add the URL link from your project after it has been uploaded to your online craft gallery. If you upload your card to an online craft gallery, please use the keyword TSG147 so we can check out your beautiful work!

My hidden surprise project is an Easter treat box using the recently released TSG Egg-stra Special stamp set.  Awhile back I made a heart shaped box for Valentines (see here) so I thought why not make a egg shaped box for Easter?!?!  I just love the way it turned out and it was so quick and easy to do too.  

I was drawn to the beautiful sorbet shades of orange in the Echo Park (Dots & Stripes) paper pad.  And that gorgeous Ivory Pleated Satin Trim Ribbon is hands down my most favorite ribbon EVA!!   I'm so excited that I no longer have to horde it since I can get an endless supply at the Ribbon Carousel
 (It even comes in PINK!!)


Here's a little quick "how to" on making the treat box:    For the base I used Spellbinders Classic Ovals & Scalloped Ovals dies.  Next, to create the box you simply cut a 4" x 4" square and a 4 1/8" x 4 1/8" square for the lid.  Score both squares at one inch on all sides.  Fold on your score lines, cut your slits and adhere with Scor-Tape or other strong adhesive.  Creating the entire box, honestly only took me five minutes!!   Wouldn't these little treat boxes be so cute sitting at the Easter table?  This treat box can holds 3-4 Ghiradelli chocolates or you could fill them with Jelly Beans and other little candies.


Need more inspiration to help you get started? Then be sure to stop by the TSG Blog to see the amazing samples that the other Trendsetters have created this week and then play along with us!


Thanks so much for stopping by!

Sunday, March 11, 2012

YNS March Release Blog Hop


Hi Everyone and Welcome to the Your Next Stamp March Release Blog Hop!!
We are showcasing lots of adorable new images and dies which are all available for purchase today!!  If you've arrived here from Dana's Blog then you're in the right place.  If not and you'd like to participate in the Blog Hop CLICK HERE to be taken to the start.  

One of the YNS DT members is a secret prize blogger so comment on all of the blogs in the hop for your chance to win.  The winner will be announced on the YNS Blog on March 14th.   Don't forget to check out the awesome bundle deals & goodies in the bargain bin too!!


I have a sweet little Easter cutie to share with you today, this is Bunny Ellie.  I fell in love with this image because it instantly reminded me of my 3 year old daughter Brooke's bunny ears.  I bought her a bunny ear headband when she was an infant and she's worn them every Easter since.  :)   


Using papers from My Mind's Eye (Happy Go Lucky) I machine stitched the background panel and added a picket fence border with a Martha Stewart punch.  I embossed the image panel with an Argyle Cuttlebug embossing folder and then added some Violet Vintage Seam Binding from Ribbon Carousel because it was such a perfect match to the papers!!


Well, it's time for you to hop on over to Kerri's Blog but before you go don't forget to leave me a comment for your chance to win a YNS Blog Hop Prize!!


Thanks for stopping by today!!

Saturday, February 18, 2012

Easter Wishes


Yes, yes...I know.  Valentines Day was just a few days ago and I've already designing my first Easter card!!  :)  Well, I just couldn't wait any longer to color up Tiddly Inks, Some Bunny Loves You - Wryn.   And of course I've used it together with Korin's sketch for this weeks Sweet Stop.  

You guys know how much I freak out when a sketch has a "tilted" element in it and I almost gave up trying to make this work but I'm so glad I hung in there because I LOVE the way it came out!!  XOXO  :)  I once again turned to my very favorite papers...My Mind's Eye (Lost & Found - Sunshine)which is 20% off right now at SCACD


This weeks sketch has a spin to it and that is to use punches or dies on your project.  Easy right!?!  :)  
I've got a little of both going on right now with a Martha Stewart Doily border punch along the bottom,  as well as a My Favorite Things Fresh Cut Grass die-namic and Cloud die-namic for my sentiment panel.  But my very favorite part of this whole card would have to be the carrot!!


This little felt carrot was created by using some embroidery floss, hot glue and My Favorite Things Banner Day Die-namic and Flower/Leaf trio die-namics.  (Yep, that's a banner die...Isn't it precious?!?!  :)  Let me know if you think I should I do a little picture tutorial on how I made it.  It's really easy!!  :)

I hope you will find some time to check out what the other Sugar Babies have done with this weeks sketch and then play along with us.


Thanks so much for stopping by today!!

Wednesday, April 13, 2011

Easter Tilda


This week at 7 Kids College Fund the challenge is...

 ~ Easter or Spring Cards ~

Should be a easy peasy challenge, but you DO need to use an image that 7 Kids College Fund carries to enter the challenge.  I've used Tilda and her Bunny from the new Butterfly Dreams Collection.  I ADORE this Tilda.  I think it's her hair along with that darling hat and bow that makes her so precious. 

The DP is My Minds Eye (Mabel) which was machine stitched round the paper panels but paper pierced around the image.   I have a huge fear of destroying my just finished image with my crazy sewing skills, LOL.  

My daughter Brooke asked if this card was for her.  She asks this about almost every card I make, so I just tell her "yes" now.  She came closer for a better look and said, "I don't like it...give it to Nathan"  and then walked off.  LOL  Heartbroken that she didn't like it (and here I was thinking it looked pretty darn good if I do say so myself) I called her back over and asked her why she didn't like it, she said, "it's not pink, I don't like orange...Nathan likes orange.  Do it again but make her pink Mommy".  LOL  I promised that I would try to color my next card pink.  :)


Challenges:
Tuesday Throwdown = #44 Sparkle & Bling
Stamptacular Sunday = #106 Girls & Swirls
Lil Red Wagon = Easter
Simon Says Stamp = Card for a child (Nathan - since Brooke won't take it, LOL)
Creative Inspirations = #107 Easter

Thanks so much for stopping by!!


Easter Egg Box


Today is a new Your Next Stamp challenge...

~ Texture ~

My little Easter Egg Box has lots of texture going on.  I created two layers with two different shades of green felt for the grass.  The top layer of grass is popped up with foam tape for dimension and so that it appears that Mini Bunny Fhiona is actually in the grass.  She was colored with Copics and is also popped up with foam tape.  The Easter egg is part of the Fluffy Chick with Egg set that was just released in March.  I first colored it with Copics, then applied a thin layer of liquid glue; just as the glue started to become tacky I sprinkled it with ultra fine crystal clear glitter and rubbed it in.  It has a beautiful sparkle to it in real life.  However, now looking at it, I wish I had colored my Easter Egg a tad bit darker.  You can still see that I added shading to the egg, but the colors lost a bit of their vibrancy with the application of the glue.  

The template for the Easter Egg Box was found HERE.  As I tend to do with most templates I use, I altered the size.  I know that I wrote my alteration measurements down somewhere, but now I can't seem to find it.  Plus my measurements were also in inches and centimeters - if that helps anyone.  (I'll update this post when I do, but it's late right now and I'm not going to go digging around looking for it.)  It was a very simple project that went together really quick.  I think I'll make another one and put the kids names on the other side of the box.  When we dye Easter eggs, then they can put on display one of their special or favorite colored eggs.  

Here's a view with the egg removed.  I used a Blossom Spellbinder die for my insert box.  Not only did it make it a little more decorative, but the scallops "held" different sized plastic eggs which made it a little more versatile.


I hope you will join us at YNS and create something with a little texture.  And you don't have to use a Your Next Stamp image to play along, but we love it when you do.  :)

Thanks so much for stopping by!!
If you have the time, please stop back by my blog later this morning when I'll have my 7 Kids College Fund sample to show.


Wednesday, March 16, 2011

Make It SPARKLE!!


It's my turn to host the Your Next Stamp challenge and I've chosen to 
~ Make It Sparkle ~

I think most of us love to add the glitter, bling and all things that sparkle to our projects so it should be an easy challenge to play along with.   I've used the new Easter Egg Tree from the Your Next Stamp March release.  I love it so much that I think this will be my family Easter card this year.  I've added all the sparkle that I could with rhinestones, Shimmerz, Stickles and the DP even has glitter in it.  The image panel is popped up with foam tape for dimension.

Challenges:
Lexi's Creations = #35 Easter
One Stitch At A Time = #53 Glitter & Gems
Karen's Doodles Netherlands = #54 Photo Inspiration
House of Gilli = #3 Pastels and Bling
Squigglefly = #89 Spring Theme
Crazy 4 Challenges = #78 Tree


Copics Used:
Pot: E44, E43, E42, E41
Tree Trunk: E25, E35, E31
Leafs: YG95, Y23, YG03, YG01, YG21
Bow: YR31, YR23, Y21, Y11, Y00
Eggs: R20, BG11, Y21

 I'll be back later today with my 7 Kids College Fund sample ~ hope you will be able to drop by again to see!

Thanks for stopping by!
Wendy

Thursday, April 1, 2010

Bunny Treats


OK, just how stinkin' cute is this?!?!

Last week 2 Cute Rubber Stamps began their 2nd Challenge with another FREE digi image! Cute and FREE, how could anyone resist? If you want yours, HOP on over here. Heidi loves to give away free stamps too, so participate in their challenge for your chance to win.

When I saw this little bunny I knew he would be perfect on a project I wanted to make for my children's Easter baskets. I originally saw the idea for this Carrot Cone on Becky Roberts Blog. I wanted to use the Bunny Digi image from 2 Cute and some raffia rather than a ribbon. I didn't have a bag to put the candy in so I improvised....I used a Wilton's Icing Bag. LOL It was the perfect shape!


I made the treat holder using my Cricut and the Storybook Cartridge. I cut a 6" scalloped circle and (1) 2 3/4" oval and (2) 2 1/4" ovals for the carrot top. Used Scor-tape to keep it all together and filled with candy. (And it actually holds a lot of candy!)

This project is for the following challenges:
2 Cute Rubber Stamps = Use their Free Digi
Pile It On = Animal-Riffic - Challenge # 12
Fantabulous Cricut = Bling (I used Shimmerz on the lollipop)
Stamp Simply = Easter


Copics Used:
RV34, RV32, R20, R11, E41, Y17, Y13, Y11, BG0000

Thanks for stopping by!

Wednesday, March 31, 2010

Happy Easter


This is the Easter card that I will be sending out to family and friends this year. So I needed a quick, simple image and card design to make mass producing easy and fast. I had been running this design around in my head for a week or more and saw that Eat Sleep Stamp had this as a sketch, I knew it was the one I wanted to use!

The image is from Whipper Snapper, DP from Autumn Leaves, Glossy Accent on the bunny's nose, paws and ladybug, a light blue pearl and waterfall Stickles on the flower. The sentiment is from PTI (Mailbox Greetings) and so is the button.

This card is for a few challenges this week. I've recently discovered Pile It On Challenge Blog and I thought it would be fun to try it. They have challenge blogs listed by the day that the challenge starts. So it's really easy to find a challenge to play along with, and all in one place!

List of Challenges:
Pile It On = Animal-Riffic
Eat Sleep Stamp = Sketchy Thursday # 76
Cute Card Thursday = Challenge # 105 Dimensions
Paper Play Challenges = Easter
Stamp Simply = Challenge # 132 Easter
Colour Create = Challenge # 41 Your Choice of Pastels


Copics Used: RV34, RV32, R20, R00, YG17, YG13, YG03, B91


Thanks for stopping by today!
Related Posts Plugin for WordPress, Blogger...